Friday, March 30, 2012

Teamviewer For Mac Is Out!!!

 Mac users, here it is... TeamViewer full version - Mac
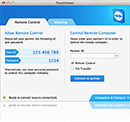
TeamViewer main window for Mac

All-In-One: TeamViewer full version

This recommended download can establish connections as well as wait for incoming connections - one convenient solution for everything.

Download v7.0.11023

Monday, March 26, 2012

How To Change The Joomla! "Site Offline" page

Found an interesting article on changing Joomla's "Site Offline" Page instead of the regular page with the big Joomla logo. Thanks to http://www.connectage.com.

Joomla! comes with it's own Site Offline page which is displayed when the site is set to "Offline Mode" within the Joomla! Administration. This page can be easily customised with your own layout, logo and colours, so it represents a message which relates to your project.
This tutorial will explain how to customise your site offline page. Here are the steps:

Step 1 - Change the Site Offline Message

The site offline message can be adjusted by logging into your Joomla! Administration and going to the Global Configuration screen, located under the menu Site > Global Configuration
The changes you make within your offline message box will be shown on your offline page when your site gets set to this status.
Site Offline - Global Configuration

Step 2 - Copy the offline.php file

Site Offline Directory StructureJoomla! Templates offer an override system, which allows you to copy core Joomla! files and place them within your own template so you can customise them and these changes will not be affected when you upgrade Joomla!. Joomla! will always look for certain things in your templates folder first before using the system values, so it works perfectly for creating our own custom overrides.
Within your Joomla! file structure, navigate to the /templates/system/, within this system folder you will see a file called offline.php. Take a copy of this file, and navigate to the /templates/yourtemplate/ directory and copy the file to this location. We can now proceed to edit this file, knowing that the original will not be affected.
You will need to do the same for a file called offline.css, located within your /templates/system/css/ folder. Copy this and place it within your /templates/yourtemplate/css/ folder.

Step 3 - Edit the offline.php file

You can now edit these two files as you wish, changing the background colours, html layout of the page, logos etc to suit your Template or site design.
 

Starhub ISP Internet Package (Singapore Vs Malaysia) T.T

Sad... the numbers speak for themselves... why the heck Malaysian ISPs are damn slow???!!!!

Thursday, March 22, 2012

Maher Zain - Number One For Me | Official Music Video

For those who love their mother... whether their mother is still alive or already passed away...
 

Hate Samsung Kies Air??? Use AirDroid!!!

Ever wonder what else to use when Samsung Kies Air always fail??? Wonder no more my fellow Androidians... now you can rely on AirDroid!!! Here's how...

1) Download AirDroid from Android Market (now Google Play).
2) There are three ways your PC can connect to your Android which is:
    a) Via Wifi (The Android device and PC need to be connected to the same WIFI).
    b) Via USB Tethering (Just plug-in the USB from your PC to your Android device).
    c) Via Mobile AP Tethering (The Android device itself becomes the AP).
3) Ok, for the first one which is via WIFI, it is pretty straight forward. Just start your AirDroid and enter the given IP address and password onto your PC's web browser.
4) For the second way, once you on your USB Tethering in your Android device, go to AirDroid and press the menu button. There will be an option on Hotspot Mode. Click on that and you're done. Access from your PC with the given IP and password. (Don't worry about your PC IP / Subnet / Gateway / DNS... it will still connect flawlessly to the given IP).
5) The third way is by making your own Android Device the AP itself. So no need to look for 3rd party AP's when you are somewhere without WIFI at all. Simply key in the IP address and the password and we are done!!!
6) Enjoy AirDroid as much as I do. (Oh and another thing, you can use it with any other Android device manufacturers... not just Samsung).

Wednesday, March 7, 2012

Linux Set Date and Time From CLI

Ever wanted to change date of your Linux or any other UNIX based OS date and time only by using terminal / konsole / ssh etc... no problem... here's how (thanks to Vivek Gite of cyberciti.bz):
 
How can I set the system date and time from the command prompt (bash shell)? I don't have GUI installed and I am login over ssh session. How can I set date under Linux operating systems?
Use the date command to display the current date and time or set the system date / time over ssh session. You can also run the date command from X terminal as root user.
This is useful if the Linux server time and/or date is wrong, and you need to set it to new values from the shell prompt.
You must login as root user to use date command.

Linux Set Date

Use the following syntax to set new data and time:
date --set="STRING"
For example, set new data to 2 Oct 2006 18:00:00, type the following command as root user:
# date -s "2 OCT 2006 18:00:00"

OR
# date --set="2 OCT 2006 18:00:00"
You can also simplify format using following syntax:
# date +%Y%m%d -s "20081128"

Linux Set Time

To set time use the following syntax:
# date +%T -s "10:13:13"

Where,
  • 10: Hour (hh)
  • 13: Minute (mm)
  • 13: Second (ss)
Use %p locale’s equivalent of either AM or PM, enter:
# date +%T%p -s "6:10:30AM"
# date +%T%p -s "12:10:30PM"

LulzSec 'Leader' Turns on Fellow Hacktivists: Feds - Yahoo! News

Just like in a hacker movie, one of the world famous hackers is working with the feds to capture other hackers (crackers) .

Six members of the suspected computer hacking groups affiliated with Anonymous were charged -- including the suspected ring leader, who directed the entire operation from a Manhattan apartment complex -- after it was revealed one of the group's most high profile members has been working with federal authorities for months.
Hector Monsegur, a 28-year-old American believed to use the name "Sabu" on the internet, was arrested by federal agents last year and has been cooperating with law enforcement ever since, officials said. He pleaded guilty last August, a plea unsealed in federal court in Lower Manhattan today.
At least at least four of the five other members of the group were arrested recently based on information provided by Monsegur -- one in Chicago and three overseas, officials said. Each were charged with conspiracy and at least two will appear in federal court in Lower Manhattan later today.
Federal officials said they expect the arrests to seriously damage LulzSec, an underground group also known as Lulz Security, which is also an offset of the hacking group Anonymous.
Law enforcement sources told ABC News that the six people charged are allegedly among the most sophisticated hackers in the world. The FBI said motives for attacks varied -- for example an attack on credit card companies was based on the refusal by the firms to process contributions to the anti-secrecy website WikiLeaks, and another attack was simply a way of mocking internet security. The investigation began with a tip last June, officials said.
The group and Anonymous have taken credit for carrying out a number of high-profile hacking actions against companies and institutions including the CIA's website, Britain's Serious Organized Crime Agency, Japan's Sony Corp and Mexican government websites.
Last month, Anonymous published a recording of a confidential call between FBI agents and London detectives in which the law-enforcement agents discuss action they are taking against hacking.
Anonymous also claimed to be behind the electronic theft of thousands of internal documents from the private intelligence analysis firm Stratfor. In charging documents released today, federal officials said that the charged co-conspirators had stolen credit card information from Stratfor employees and clients and made some $700,000 in unauthorized charges.
Earlier this week, a Twitter account connected to Sabu continued to rant against federal agents, supposedly while he was working with them.
"The federal government is run by a bunch of f*****g cowards. Don't give in to these people. Fight back. Stay strong," a tweet from Monday reads.
While Anonymous and LulzSec by nature have no official hierarchy, the user known as Sabu was one of the most vocal and prominent members in online communities. Fox News first reported Monsegur's alleged involvement with the today's arrests.
ABC News' Jason Ryan, Mark Crudele and Lee Ferran contributed to this report.

Monday, March 5, 2012

How to Upload Large Files in PHP (in 4 steps only)

I know this info is like a core-knowledge of PHP programming, but just want to share it with my dear visitors. (Thanks to Sitepoint).

Uploading a file from a web form in PHP is easy. The online manual provides a Handling File Uploads section, and there are several articles on sitepoint.com, including How To Handle File Uploads With PHP by Kevin Yank.

One of the most popular uses is image uploads. Your users can submit photographs from a form without resorting to FTP or other convoluted methods. HTML5 and Flash also permit drag and drop, so the operation is likely to become easier as browsers evolve.
This is where the problems can begin. Camera manufacturers continually brag that they have a larger set of megapixels than their competitors. It’s all rubbish, of course — unless you’re a professional photographer or need to print extremely large images, anything over 4MP is fairly pointless and lens quality is much more important. However, even low-end compacts have 12MP and mobile phones have more than 5MP. The result is that a typical snapshot can easily be 6MB in size.

By default, PHP permits a maximum file upload of 2MB. You can ask users to resize their images before uploading but let’s face it: they won’t. Fortunately, we can increase the limit when necessary.

Two PHP configuration options control the maximum upload size: upload_max_filesize and post_max_size. Both can be set to, say, “10M” for 10 megabyte file sizes.
However, you also need to consider the time it takes to complete an upload. PHP scripts normally time-out after 30 seconds, but a 10MB file would take at least 3 minutes to upload on a healthy broadband connection (remember that upload speeds are typically five times slower than download speeds). In addition, manipulating or saving an uploaded image may also cause script time-outs. We therefore need to set PHP’s max_input_time and max_execution_time to something like 300 (5 minutes specified in seconds).